Mouse and keyboard controls
This page lists the mouse, touch, and keyboard controls for the HistomicsUI image viewer.
Basic image controls
Pan
- Left-drag: Hold down the left mouse button and drag the image to change the area that is in view.
- Middle-drag: Hold down the middle mouse button and drag the image to change the area that is in view. This works even when editing annotations.
- Single touch drag.
- Arrow keys: Nudge the area in view by one screen pixel. Hold
shiftwhile pressing an arrow key to move by half a screen.shift+ctrlwith an arrow key moves an intermediate amount.
Zoom
- Right-drag: Hold down the right mouse button and drag up or down to change the zoom level.
- Mouse wheel.
- Multi-touch spread or contract.
+,-: Zoom by 1/20th of a power of 2. Withshift, zoom by a power of 2. Withshift+ctrl, zoom by 1/4th of a power of 2.1–7: Zoom to discrete levels.1zooms all the way out, and each successive number zooms in further by a power of 8.- Shift-left-drag, shift-right-drag: Zoom into or out of the selected rectangle.
Rotate
- Left-ctrl-drag: Hold down
ctrland the left mouse button to rotate the image. - Ctrl-mouse wheel.
- Multi-touch rotate.
<,>(also.or,): Rotate the image a small amount. Withshift,<and>rotate by 90 degrees.0: Return the image to the default orientation.
Overview image controls
Pan
- Left-drag: Drag anywhere inside the view rectangle to change the area that is in view.
- Left-click: Click anywhere in the overview window to recenter the main image around that point.
Zoom
- Shift-left-drag: Draw a rectangle on the overview and the selected area
is shown in the main image. If
shiftis held throughout, the selection is constrained to a square. Ifshiftis released after starting, the selection can be any rectangle.
Annotation controls
Show or hide all annotations
a: If any annotations are hidden, show all annotations. If all annotations are shown, hide all annotations.
Select annotations
- Right-click: Right-clicking an annotation element opens a context menu to change its style group, edit its shape or properties, or delete it. If more than one element is selected, the menu applies to all selected elements.
m: Show the context menu for the selected annotations. If nothing is selected, show the context menu for the annotation under the mouse cursor.s: Switch to area-select mode. Left-drag a rectangle around elements to select them.S: Switch to area-select polygon mode. Draw a polygon around elements to select them.C: Clear the current selection.- Ctrl-left-click: Toggle whether an individual annotation element is selected.
Create an annotation
space: Show the new annotation dialog. This is the same as clicking the New button.
Draw an annotation element
o,r,i,c,p,l,b: Switch to point, rectangle, ellipse, circle, polygon, line, or brush drawing mode. If already in that mode, turn it off.shift: While drawing a rectangle or ellipse, holdshiftafter starting to adjust it to a square or circle.
enter: While drawing a line or polygon, finish drawing, closing the polygon or terminating the line.esc: Cancel drawing an annotation element.
Edit or modify an annotation shape
e: With the mouse over an annotation element, put it in edit mode. This is the same as choosing Edit Shape from the context menu.-
shift: While drawing an element with area (everything except points and lines), switch to Add mode. Holdshiftwhen the annotation is started (the first point in a polygon, rectangle, and so on). When finished, the element is combined with existing elements in the same annotation document and style group.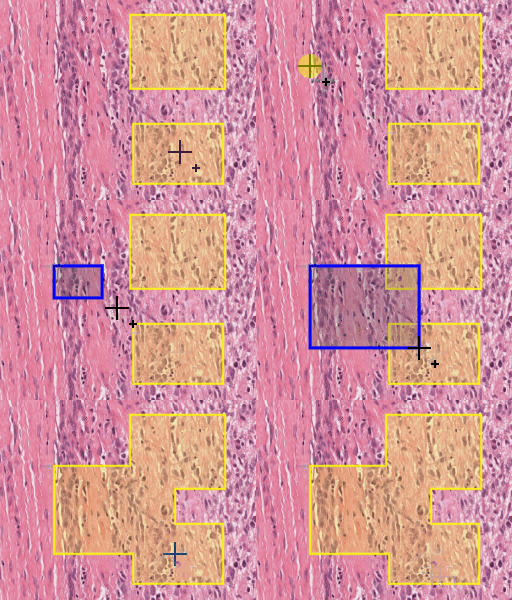
-
ctrl: While drawing an element with area, switch to Subtract mode. The drawn annotation is removed from existing elements in the same annotation document and style group.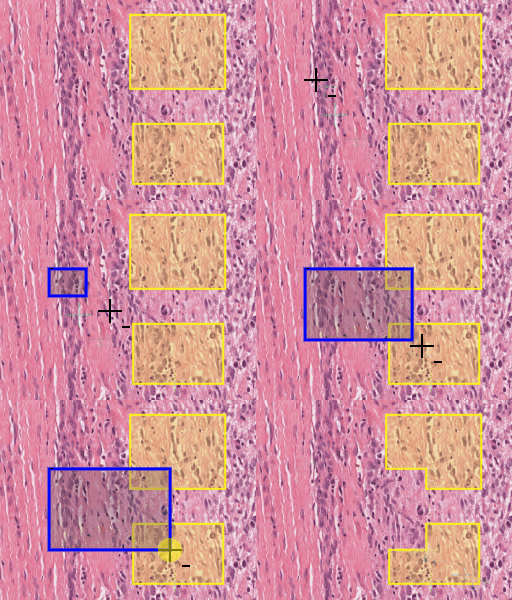
-
ctrl: While drawing a line annotation, switch to Cut mode. The line splits any area annotations with the same style group.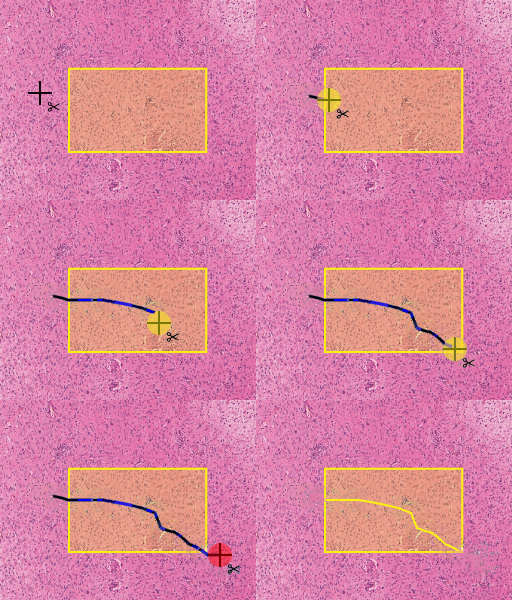
-
ctrl+alt: While drawing an annotation with area, switch to Cut mode. The drawn annotation splits any area annotations with the same style group. -
shift+ctrl: While drawing an element with area, switch to Union mode. The drawn annotation is combined with nearby existing elements in the same annotation document and style group, keeping only area that is in both the new and existing elements.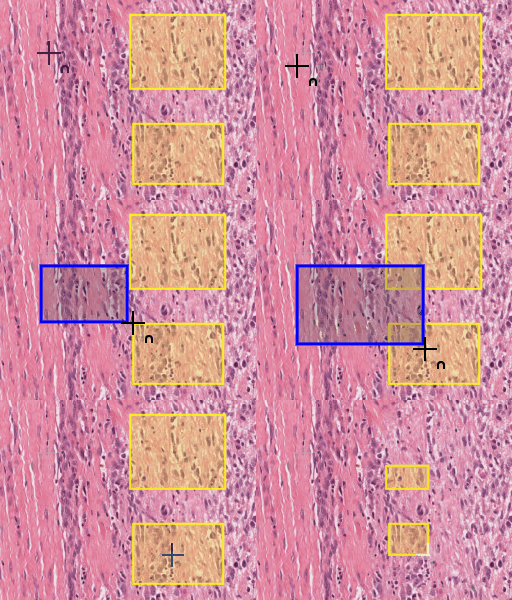
-
shift+alt: While drawing an element with area, switch to XOR mode. The drawn annotation is combined with nearby existing elements in the same annotation document and style group, keeping area that is in either but not both, and removing area that is in both.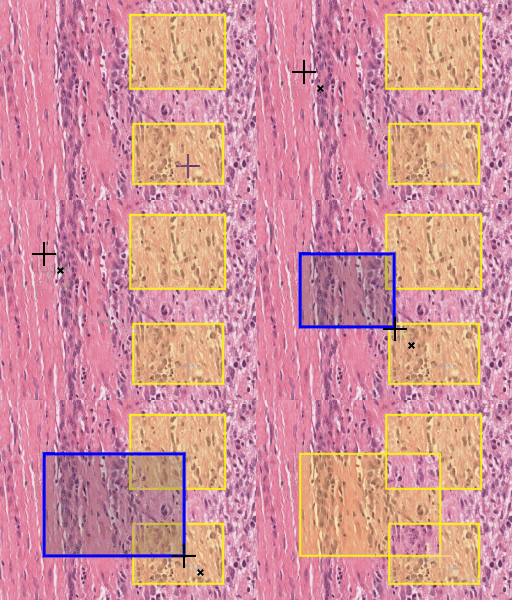
Brush controls
The brush drawing tool always combines with existing annotation elements in the current annotation and style.
B: Cycle through the brush shapes (square and circle).[,]: Change the size of the brush.
Change the style group
q,w: Cycle through the available style groups for the current selection.
Pixelmap controls
- Left-click a superpixel to change its category to the current style group.
- Shift-left-drag to change multiple superpixels as the mouse passes over them.
Frame selector controls
Channel and band controls
When compositing channels or bands, you can toggle the visibility of individual channels or bands.
ctrl+<number>: Toggle the visibility of channels or bands 1 through 10.alt+ctrl+<number>: Toggle the visibility of channels or bands 11 through 20.
Source and version
Adapted from HistomicsUI's
docs/controls.rst
(Apache-2.0), last changed in commit
2e9a298
on 2025-12-03, and adapted on 2026-11-01.
Tested with: HistomicsUI at that commit. This page was not re-executed against a live viewer in this documentation slice, so treat the source file as authoritative if a shortcut differs in your build.